Often, the best way to capture that perfect moment is with a snap of a photo on your smartphone. But not all photos come out in the desired orientation. From breathtaking portraits to scenic landscapes, you often need to convert vertical images to horizontal. Fortunately, with the right tools and techniques, turning your vertical photos into stunning horizontal compositions is easier than you might think.
How To Make A Vertical Photo Horizontal Understanding Aspect Ratios
Aspect ratios play a pivotal role in photography and design, influencing how images are perceived and displayed across various mediums. Essentially, the aspect ratio of an image refers to the proportional relationship between its width and height. It is expressed as a ratio, typically in the form of two numbers separated by a colon, such as 4:3 or 16:9. Understanding aspect ratios is crucial for ensuring that your images are properly framed and displayed, whether it’s for print, web, or social media.
Common Aspect Ratios
Several standard aspect ratios are commonly used in photography and design:
- 1:1 (Square): This aspect ratio is often associated with social media platforms like Instagram, where square images are prominently displayed in the feed. Square photos offer a balanced composition and are ideal for showcasing single subjects or central compositions;
- 4:3 (Standard): The 4:3 aspect ratio is a common standard used in photography and older television screens. It provides a slightly wider view compared to square images and is well-suited for a variety of compositions, including landscapes, portraits, and group shots;
- 16:9 (Widescreen): Widely used in video production and modern displays, the 16:9 aspect ratio offers a panoramic view with a wider width relative to height. It is commonly found in digital cameras, smartphones, and high-definition television screens, making it ideal for capturing scenic landscapes and cinematic shots;
- 3:2 (35mm Film): Historically derived from traditional 35mm film cameras, the 3:2 aspect ratio offers a slightly elongated view compared to standard ratios. It remains popular among photographers for its versatility and compatibility with print sizes, making it a preferred choice for capturing a wide range of subjects.
Impact on Composition
Aspect ratios significantly influence the composition and visual impact of an image. Here’s how different aspect ratios can affect your compositions:
- Vertical vs. Horizontal Orientation: The choice between a vertical (portrait) or horizontal (landscape) orientation depends on the subject and desired composition. Vertical orientations are often used for portraits, tall structures, and scenes with dominant vertical elements, while horizontal orientations are suitable for landscapes, panoramic views, and group shots;
- Framing and Cropping: Understanding the aspect ratio of your target medium helps determine how to frame and crop your images effectively. For example, if you’re preparing images for a website with a specific aspect ratio requirement, you may need to crop or resize your photos accordingly to ensure they fit seamlessly within the layout.
The aspect ratio plays a crucial role in achieving visual balance and harmony within your compositions. It dictates the amount of negative space surrounding the main subject, influencing the overall aesthetics and impact of the image.
Adaptability and Flexibility
While understanding aspect ratios is essential for maintaining visual coherence and consistency, it’s also important to embrace flexibility and adaptability in your creative process. Experimenting with different aspect ratios allows you to explore new perspectives, enhance storytelling, and create visually compelling narratives.
In conclusion, aspect ratios serve as fundamental guidelines for framing, composing, and presenting images effectively. By mastering the principles of aspect ratios and understanding their impact on composition, you can elevate your photography skills and produce captivating visuals that resonate with your audience across various platforms and mediums.
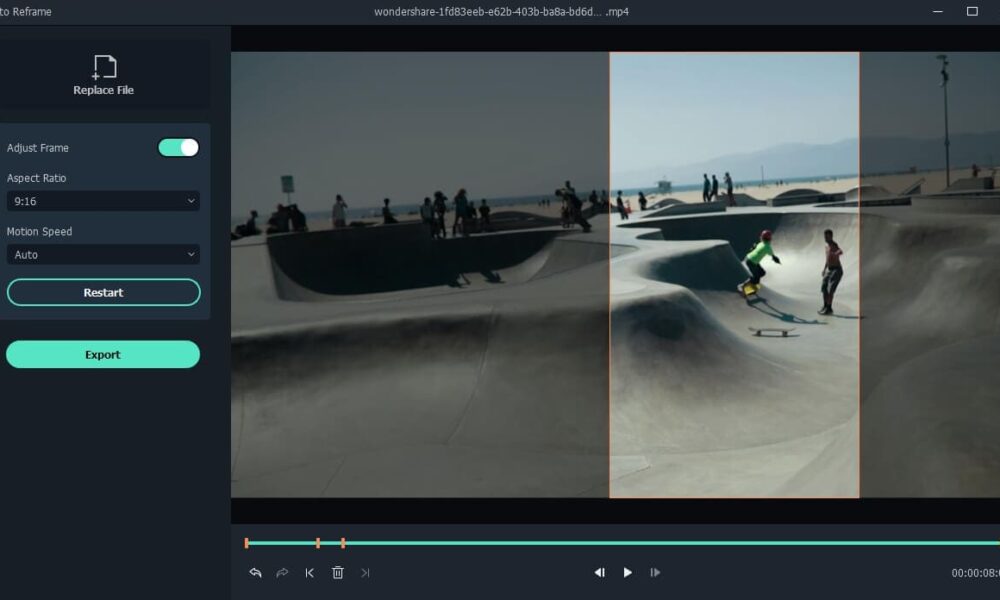
How To Make A Vertical Photo Horizontal Utilizing Editing Software
<iframe width=”560″ height=”315″ src=”https://www.youtube.com/embed/v3Y1wlxLI3g?si=5M5m7V-cMOqYW31W” title=”YouTube video player” frameborder=”0″ allow=”accelerometer; autoplay; clipboard-write; encrypted-media; gyroscope; picture-in-picture; web-share” allowfullscreen></iframe>
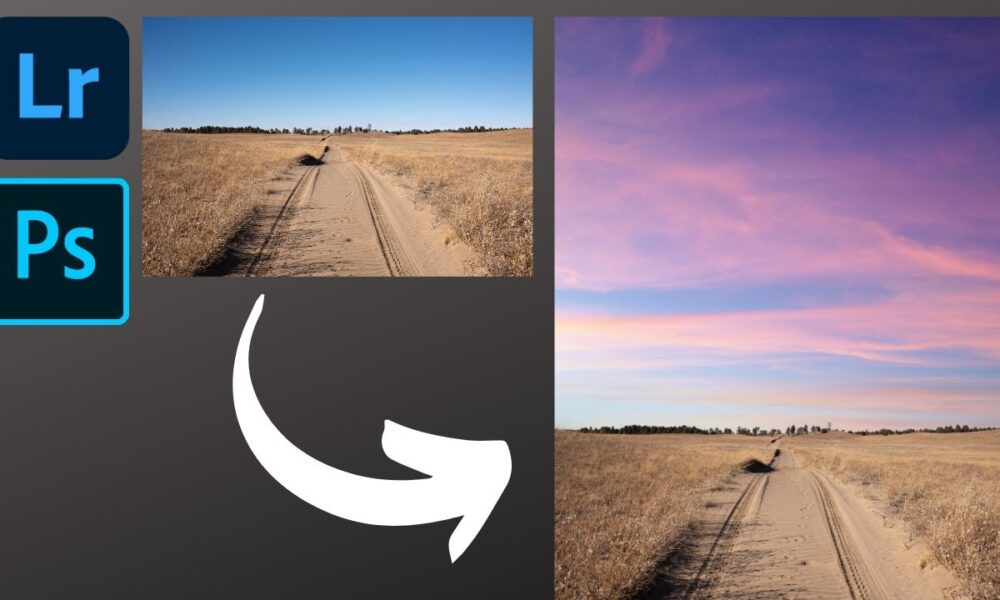
One of the most efficient ways to transform vertical photos into horizontal ones is by using editing software. Popular photo editing tools like Adobe Photoshop, Lightroom, or even free alternatives like GIMP offer functionalities to adjust aspect ratios and crop images accordingly.
- Cropping: Begin by opening your vertical photo in your preferred editing software. Navigate to the cropping tool and adjust the dimensions to achieve a horizontal orientation. Ensure that the essential elements of the image are retained within the frame while removing any excess space;
- Content-Aware Fill (Optional): Some advanced editing software features content-aware fill capabilities, which can intelligently fill in the gaps created during the cropping process. This tool can seamlessly extend the background or surroundings of the image to maintain its integrity;
- Canvas Extension: If cropping alone doesn’t suffice, consider extending the canvas size to accommodate a horizontal aspect ratio.
This technique involves adding blank space around the vertical image and filling it with content to match the original scene seamlessly.
How To Make A Vertical Photo? Leveraging Online Tools and Apps
Here’s how you can make the most out of online tools and apps for photo editing:
- Pixlr is a versatile online photo editing platform that offers a range of tools and features for editing images effortlessly. From basic adjustments like cropping and resizing to advanced filters and effects, Pixlr provides a user-friendly interface suitable for both beginners and experienced editors. Its cloud-based nature allows you to access your projects from any device with an internet connection, making it convenient for on-the-go editing;
- Canva is renowned for its intuitive interface and extensive library of design templates, making it a popular choice for creating graphics and visual content. In addition to its design features, Canva offers basic photo editing tools that allow you to adjust brightness, contrast, and saturation, as well as apply filters and effects. With its drag-and-drop functionality, you can easily enhance your photos and create stunning designs without any prior editing experience;
- Fotor is a comprehensive online photo editing suite that caters to photographers of all skill levels. Its array of editing tools includes everything from basic adjustments to advanced retouching features like blemish removal and wrinkle reduction. Fotor also offers a variety of creative effects and filters, as well as design templates for creating collages, posters, and social media graphics. Whether you’re editing portraits, landscapes, or still life shots, Fotor provides the tools you need to achieve professional-quality results;
- Snapseed is a powerful mobile photo editing app that offers a wide range of tools and filters for enhancing your photos on the go. Its intuitive interface allows for precise control over adjustments like brightness, contrast, and saturation, as well as selective editing features for fine-tuning specific areas of your image. Snapseed also provides a variety of creative filters and effects, including lens blur, vintage styles, and grainy film textures, allowing you to add a unique flair to your photos with ease;
- Adobe Lightroom Mobile brings the power of Adobe’s professional photo editing software to your smartphone or tablet. With its comprehensive set of editing tools, including raw file support, selective editing brushes, and advanced color grading controls, Lightroom Mobile allows you to transform your photos into stunning masterpieces wherever you are. Its seamless integration with Adobe Creative Cloud enables you to sync your edits across devices and access your full-resolution photos from anywhere, ensuring a seamless editing workflow from capture to final output.
Whether you’re editing photos for social media, personal projects, or professional portfolios, leveraging online tools and apps can streamline your workflow and elevate your images to new heights. With their intuitive interfaces, powerful features, and accessibility, these tools empower photographers and creatives to unleash their full potential and bring their vision to life. Experiment with different tools and techniques to discover the ones that best suit your editing style and preferences, and watch as your photos transform into works of art.
How Can Creative Composition Techniques Enhance Your Photos?
Composition is the foundation of great photography, allowing photographers to tell compelling stories and evoke emotions through their images. While mastering the fundamentals of composition is essential, exploring creative techniques can take your photos to the next level. Here are some innovative composition techniques to help you capture stunning and visually captivating photos:
- Leading Lines. Utilize natural or man-made lines within your frame to guide the viewer’s eye towards the main subject or focal point of your image. Whether it’s a winding road, a row of trees, or architectural elements, leading lines add depth and visual interest to your photos, creating a sense of movement and direction;
- Frame within a Frame. Frame your subject within a natural or man-made frame within the scene, such as an archway, window, or foliage. This technique adds layers to your composition, drawing attention to the subject while providing context and depth to the image. Experiment with different framing elements to create unique and visually compelling compositions;
- Negative Space. Embrace the power of negative space by incorporating empty or uncluttered areas within your composition. Negative space allows the main subject to stand out and breathe, creating a sense of balance and harmony in your photos. Use negative space strategically to evoke emotions and convey a sense of calmness or solitude;
- Symmetry and Patterns. Explore symmetry and patterns in your compositions to create visually striking and harmonious images. Look for repetitive elements, such as architectural details, natural formations, or reflections, and frame them symmetrically within your frame. Symmetry and patterns add a sense of order and balance to your photos, drawing the viewer’s eye and creating a sense of visual rhythm;
- Forced Perspective. Play with perspective and scale to create optical illusions and surreal effects in your photos. Experiment with different angles, viewpoints, and focal lengths to distort or exaggerate the size and proportions of objects within your frame. Forced perspective adds a sense of whimsy and intrigue to your images, inviting viewers to look closer and discover hidden details;
- Reflections. Incorporate reflections from water, glass, or other reflective surfaces to add depth and complexity to your compositions. Reflections create visual symmetry and juxtaposition, doubling the impact of your subject and enhancing the overall visual appeal of your photos. Experiment with different angles and perspectives to capture mesmerizing reflections that enhance your storytelling;
- Dynamic Composition. Break free from conventional composition rules and embrace dynamic and unconventional compositions that challenge the viewer’s expectations. Experiment with off-center compositions, asymmetrical balance, and unconventional framing to create visually dynamic and engaging images that spark curiosity and intrigue.
By incorporating these creative composition techniques into your photography repertoire, you can elevate your images from ordinary to extraordinary. Experiment with different techniques, push the boundaries of your creativity, and trust your instincts to capture stunning and visually compelling photos that leave a lasting impression on your audience. Remember that composition is subjective, so don’t be afraid to break the rules and forge your own path as a photographer. Embrace experimentation and creativity, and watch as your photography evolves into a powerful form of visual storytelling.
How do I make a vertical picture horizontal on my iPhone?
Making a vertical picture horizontal on your iPhone is a straightforward process using the built-in editing tools in the Photos app. Here’s a step-by-step guide to help you do it:
- Open the Photos App: Launch the Photos app on your iPhone;
- Select the Vertical Photo: Navigate to the vertical photo you want to make horizontal and tap on it to open it in full screen;
- Tap Edit: Once the photo is open, tap the “Edit” button located in the top right corner of the screen. This will open the editing interface;
- Crop the Photo: Tap the crop icon, which looks like a square with lines inside it, usually located at the bottom of the screen;
- Adjust the Crop: Using your fingers, adjust the crop box to change the orientation from vertical to horizontal. You can drag the corners or sides of the crop box to resize it. Make sure the important elements of your photo are included within the horizontal frame;
- Apply the Crop: Once you’re satisfied with the crop, tap the “Done” button in the bottom right corner of the screen to apply the changes;
- Save the Edited Photo: Finally, tap the “Done” button again to exit the editing mode. Your photo will be saved automatically with the horizontal orientation.
That’s it! You’ve successfully made your vertical picture horizontal using your iPhone’s Photos app. You can now share or use your edited photo as desired.
Conclusion
Converting vertical photos into horizontal ones opens up a world of possibilities for enhancing visual storytelling and creating captivating compositions. Whether you’re a seasoned photographer or an amateur enthusiast, mastering the art of transformation will elevate your photography skills and leave a lasting impression on your audience. With the right tools, techniques, and a dash of creativity, you can seamlessly transition from vertical to horizontal with ease.