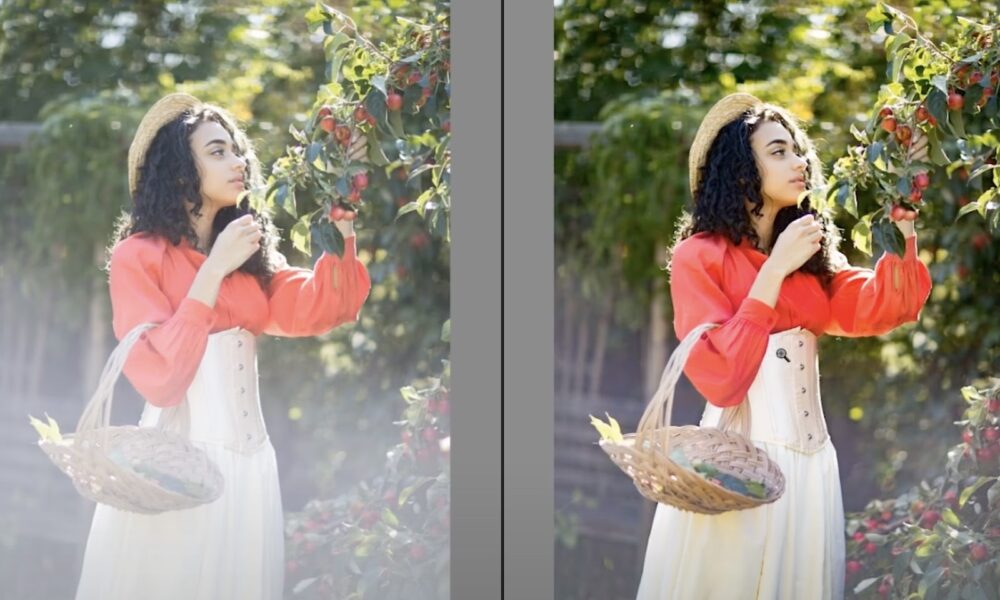
Are you tired of capturing the perfect shot, only to discover that a pesky light glare has ruined it? Don’t worry, you’re not alone. Light glares can be frustrating and often ruin what could have been a beautiful photo. But fear not, there are ways to remove light glare from your photos and enhance their overall quality.
In this article, we will guide you through the process of removing light glare from photos using Adobe Lightroom or your preferred editing software. We will cover everything from loading your images to applying the necessary adjustments. So grab your camera and let’s get started!
Load Your Images into Adobe Lightroom or Your Preferred Editing Software
The first step to removing light glare from your photos is to load them into an editing software. For this tutorial, we will be using Adobe Lightroom, but the steps can be applied to any editing software of your choice.
- Open Adobe Lightroom and import your photos by clicking on the “Import” button located at the bottom left corner of the screen. This will open the import dialog box;
- Navigate to the folder where your photos are stored and select the ones you want to edit;
- Once selected, click on the “Import” button at the bottom right corner of the import dialog box. This will import your photos into Lightroom.

Feather According to Your Preference
Now that your images are loaded into Lightroom, it’s time to start removing the light glare. This requires careful adjustments to the feathering of the image. Feathering refers to the softness of the edges in an image, and it can be adjusted to blend out harsh lines or glares.
Adjust Feathering in Lightroom
- Select the photo you want to edit from the filmstrip at the bottom of the Lightroom window;
- Click on the “Develop” tab at the top right corner of the screen. This will open the editing tools;
- Navigate to the “Adjustment Brush” tool located in the toolbar on the right-hand side of the screen. It looks like a paintbrush;
- In the brush settings, adjust the feathering by moving the slider to the left or right. A lower value will result in a sharper edge, while a higher value will create a softer edge;
- Use the adjustment brush to carefully blend out the light glare by painting over it with a soft feathering.
Adjust Feathering in Other Editing Software
If you are using a different editing software, the process may be slightly different, but the principle remains the same. Look for a tool that allows you to adjust the feathering or softness of your brush and use it to blend out the light glare.
Is Correct Exposure and White Balance Important?
Light glares can often cause overexposure or color issues in photos. To make your photo look more natural, it’s important to correct its exposure and white balance.
Adjust Exposure
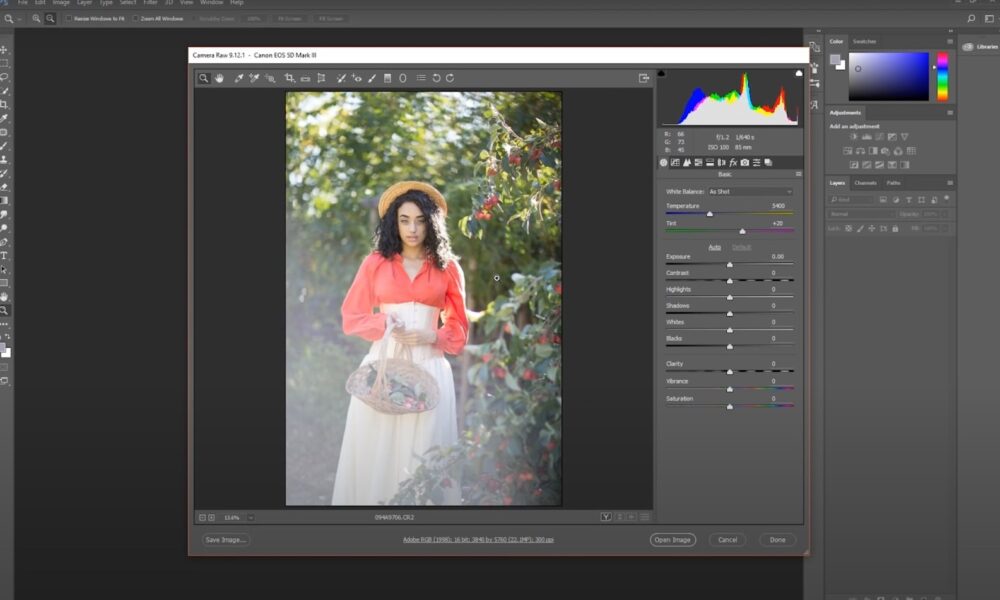
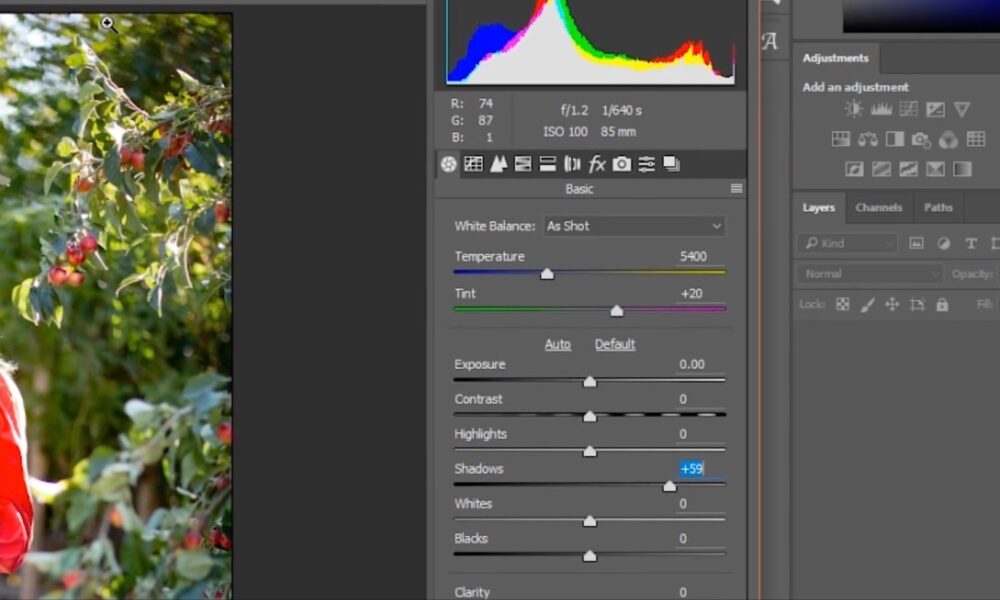
- Still in the “Develop” tab, navigate to the “Basic” panel on the right-hand side of the screen. This is where you can make basic adjustments to your image;
- Adjust the exposure slider by moving it to the left or right until the overall brightness of the image looks natural;
- You can also use the “Highlights” and “Shadows” sliders to further adjust the exposure if needed.

Adjust White Balance
- Next, we’ll adjust the white balance to get rid of any color issues caused by the light glare;
- In the “Basic” panel, locate the “Temperature” and “Tint” sliders;
- Move the sliders to adjust the temperature and tint of your image until the colors look natural;
- You can also use the “White Balance Selector” tool to click on a neutral area in your photo for an automatic white balance adjustment.
How to Use the Clone and Healing Tools?
If the light glare is particularly stubborn or in a distracting area of the photo, you can use the clone and healing tools to remove it completely.
Clone Tool
- In the toolbar on the right-hand side of the screen, select the “Clone” tool. It looks like a stamp;
- Adjust the brush size according to the size of the light glare by using the bracket keys on your keyboard;
- Hold down the “Alt” key (PC) or “Option” key (Mac) and click on an area of the photo that is similar to the area where the light glare is located. This will set the source point for the clon;
- Release the “Alt” or “Option” key and carefully paint over the light glare with the clone tool. The selected area will be cloned onto the light glare, effectively removing it from the photo.
Healing Tool
If the light glare is in a more complex area with patterns or textures, the healing tool may be more effective.
- Select the “Healing” tool from the toolbar on the right-hand side of the screen. It looks like a bandaid;
- Adjust the brush size according to the size of the light glare;
- Carefully paint over the light glare, and the healing tool will automatically blend it into the surrounding area.
Can Adjustment Layers Be Used?
Adjustment layers are a powerful tool that allows you to make non-destructive changes to your photos. They are great for removing light glares while maintaining the original image.
Create an Adjustment Layer
- In the “Develop” tab, navigate to the “Adjustment Brush” tool;
- Click on the “New” button located at the top left corner of the editing tools. This will create a new adjustment layer;
- Use the brush to carefully paint over the light glare, making sure that only the affected area is selected.
Apply Adjustments
- With the adjustment layer selected, you can now make adjustments to only the selected area of the photo;
- For example, you can decrease the highlights or increase the shadows to reduce the visibility of the light glare;
- You can also adjust the color temperature or tint to remove any discoloration caused by the light glare.
Should I Use Presets or Filters?
If you’re not confident in your editing skills or simply want a quick fix, you can use presets or filters to remove light glares from your photos. These are pre-made settings that you can apply to your photos with just one click.
Presets in Lightroom
- In the “Develop” tab, navigate to the “Presets” panel on the left-hand side of the screen;
- Click on the small plus sign (+) and then select “Import Preset.”;
- Navigate to the folder where your downloaded presets are stored and select the preset you want to import.
- The preset will appear at the bottom of the preset list, and you can click on it to apply it to your photo.
Filters in Other Editing Software
Most other editing software also have preset filters that you can apply to your photos. The process may vary, but it usually involves selecting the filter and adjusting its intensity to your liking.
Conclusion
Removing light glares from your photos can be a tedious process, but the end result is well worth it. By following the steps outlined in this article, you can easily remove light glares and enhance the overall quality of your photos. Remember to always save your edited photos as a separate file so you don’t lose the original, and feel free to experiment with different tools and techniques to achieve the desired effect.
