Are you tired of uploading pictures to your website or social media only to find out they are too large or too small? Or perhaps you want to print a picture, but it doesn’t fit the frame size? Whatever the reason, resizing an image can be a frustrating task. But fear not, with Adobe Photoshop, the leading software for photo editing and manipulation, resizing an image has never been easier.
In this comprehensive guide, we will take you through the step-by-step process of resizing an image using Adobe Photoshop. Whether you are a beginner or an expert, this article will provide you with all the information you need to successfully resize your images. So, grab a cup of coffee, sit back, and let’s dive into the world of image resizing with Adobe Photoshop.
What Is Image Size and Resolution?
Before we jump into the steps of resizing an image, it is important to understand two crucial concepts: image size and resolution. These two terms are often used interchangeably, but they have different meanings and play a significant role in the overall quality of your image.
Image Size
Image size refers to the dimensions of an image in terms of width and height. It is measured in pixels and determines how large or small an image appears on your screen or when printed. For example, an image with dimensions 2000 x 1500 pixels has a width of 2000 pixels and a height of 1500 pixels.
Resolution
Resolution, on the other hand, refers to the number of pixels per inch (PPI) in an image. It determines the level of detail and sharpness of an image. The higher the resolution, the more pixels there are in every inch, resulting in a clearer and more detailed image. Resolution is typically measured in pixels per inch (ppi) or dots per inch (dpi).
Why Resize an Image?
Now that we have a basic understanding of image size and resolution, you may be wondering why you need to resize an image in the first place. Well, there are several reasons why you may want to resize an image. Let’s take a look at some of them:
- Website Optimization: Large images can significantly slow down your website’s loading speed, leading to a poor user experience. By resizing images to the appropriate dimensions, you can optimize your website’s performance and improve its overall speed;
- Social Media: Each social media platform has specific size requirements for images. If your image does not meet these requirements, it may be distorted or cropped, affecting its quality. By resizing your images, you can ensure they fit perfectly on your social media profiles;
- Print: When printing images, you need to consider the size of the frame or paper you are using. If the image is too large, it may not fit the frame or paper, and if it is too small, it may appear pixelated. Resizing your images allows you to print them in the desired size without losing quality;
- Storage Space: Large images take up more storage space on your computer or camera. By resizing them, you can save space and store more images without compromising on quality.
Now that we understand the importance of resizing images let’s move on to the main topic of this article – how to resize an image using Adobe Photoshop.
Step 1: Open Your Image in Photoshop
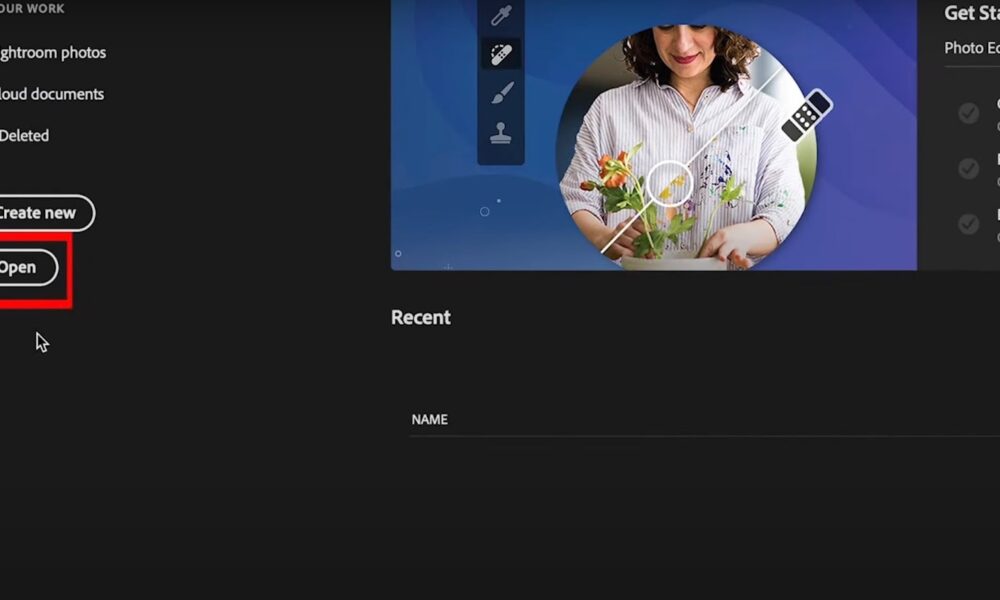
The first step is to open your image in Adobe Photoshop. To do this, follow these simple steps:
- Launch Adobe Photoshop;
- Go to File > Open or use the keyboard shortcut Ctrl+O (Command+O on Mac);
- Navigate to the location of the image you want to resize, select it, and click “Open.”

Your image will now open in Photoshop, and you can begin the resizing process.
Step 2: Check Image Size and Resolution
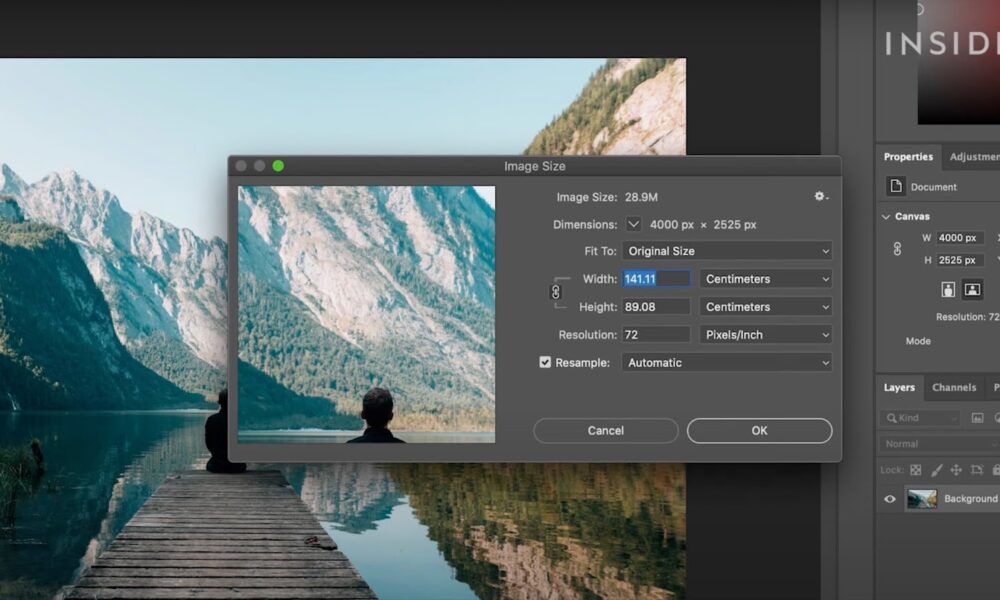
Before you start resizing your image, it is essential to check its current size and resolution. This will give you a better understanding of how much you need to resize it and the final result you can expect.
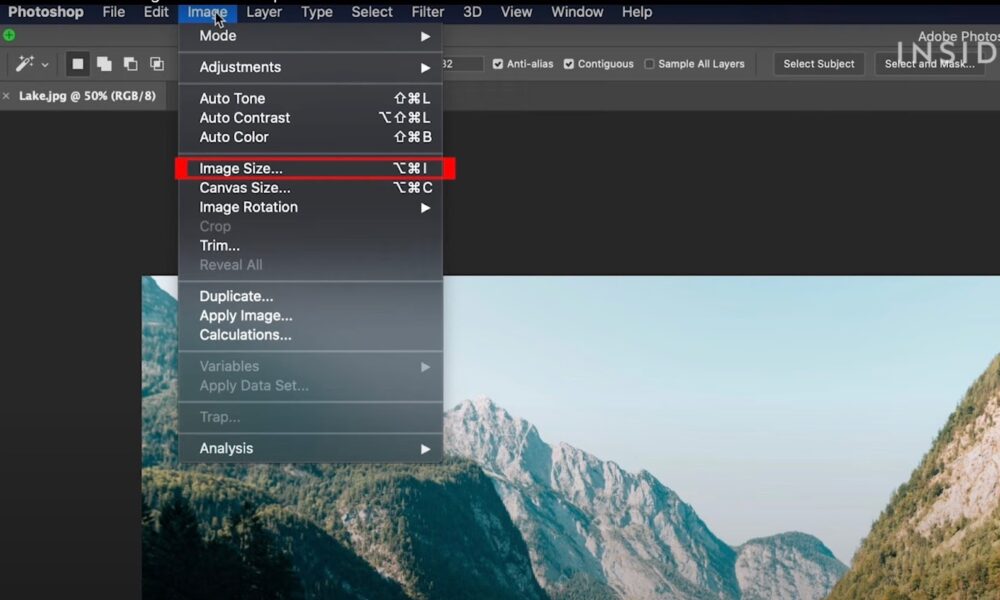
- In Photoshop, go to Image > Image Size;
- The Image Size dialog box will appear, displaying your image’s current dimensions in pixels and its resolution in pixels per inch (ppi);
- Take note of these values, as they will change once you resize your image.

Step 3: Choose the Resizing Method
There are two ways to resize an image in Adobe Photoshop – by using the “Image Size” tool or the “Canvas Size” tool. The method you choose will depend on the kind of resizing you want to do – either changing the overall dimensions of the image or resizing the canvas while keeping the image size the same.

Resizing with Image Size Tool
The “Image Size” tool allows you to change the image’s actual size without affecting the canvas size. This method is best used when you want to reduce the image’s size for web use or print.
To resize an image using the “Image Size” tool, follow these steps:
- Go to Image > Image Size;
- In the Image Size dialog box, uncheck the “Resample Image” option at the bottom, as this may affect the quality of your image;
- Enter the desired width or height of your image in pixels;
- If needed, you can also change the resolution, but keep in mind that this will affect the image’s quality;
- Click “OK” to apply the changes.
Your image will now be resized to the dimensions you specified.

Resizing with Canvas Size Tool
If you want to change the overall size of your image, including the canvas, then the “Canvas Size” tool is the way to go. This method is useful when you want to add more space around your image or reduce its overall size.
To resize an image using the “Canvas Size” tool, follow these steps:
- Go to Image > Canvas Size;
- In the Canvas Size dialog box, enter the desired width and height of your canvas in pixels;
- If needed, you can also change the anchor position, which determines where the image will be placed on the canvas;
- Click “OK” to apply the changes.
Your canvas size and image size will now be adjusted accordingly.
Step 4: Resizing for Web Use
Now that you know how to use the “Image Size” and “Canvas Size” tools let’s look at resizing images for web use. Typically, images used on the web are smaller in size compared to print images. These images should also have a resolution of 72 ppi for optimal web viewing.
To resize an image for web use, follow these steps:
- Go to Image > Image Size;
- Check the “Resample Image” option at the bottom;
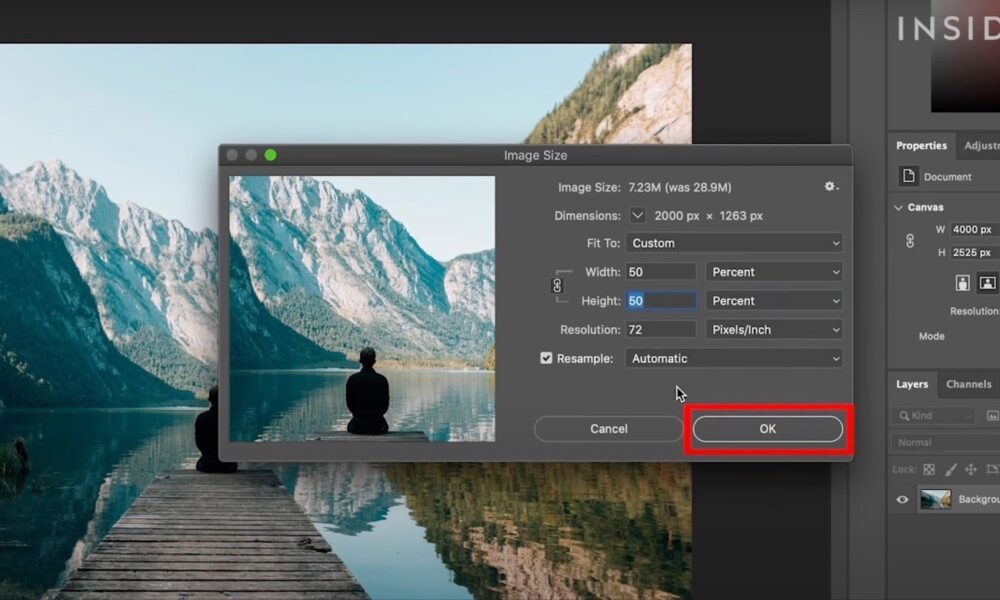
- Change the units from pixels to percent;
- Enter the desired percentage of the original image size you want to resize it to;
- Make sure the resolution is set to 72 ppi;
- Click “OK” to apply the changes.
Your image will now be resized to the desired dimensions, suitable for web use.
Step 5: Resizing for Print
When printing images, you need to consider the size of the paper or frame you will be using. This will ensure that your image fits perfectly without any distortion or pixelation.
To resize an image for printing, follow these steps:
- Go to Image > Image Size;
- Check the “Resample Image” option at the bottom;
- Change the units to inches or centimeters, depending on your preference;
- Enter the desired dimensions of your print size;
- Make sure the resolution is set to 300 ppi for high-quality prints;
- Click “OK” to apply the changes.
Your image will now be resized to the desired print size without losing any quality.
Step 6: Resizing for Social Media
Resizing images for social media can be a bit tricky as each platform has its own size requirements. However, with Adobe Photoshop, you can easily resize your images to fit perfectly on any social media profile.
To resize an image for social media, follow these steps:
- Go to Image > Image Size;
- Check the “Resample Image” option at the bottom;
- Change the units to pixels;
- Enter the required dimensions for the specific social media platform you are using. You can refer to this social media image size guide for reference;
- Make sure the resolution is set to 72 ppi;
- Click “OK” to apply the changes.
Your image will now be resized to fit perfectly on your chosen social media platform without any distortion.
Conclusion
Resizing images may seem like a daunting task, but with Adobe Photoshop, it can be done in just a few simple steps. By following the techniques outlined in this guide, you can resize your images to fit any purpose, whether it’s for web use, printing, or social media.
Remember to always check the image size and resolution before and after resizing to ensure that your images meet the required specifications. With practice and experimentation, you will become a pro at resizing images using Adobe Photoshop. So go ahead and give it a try and see the amazing results for yourself!
