There exists a realm of creativity where portraits transcend their original form to become vast, sweeping landscapes. This transformation isn’t just a matter of stretching pixels; it’s about capturing the essence of a portrait and imbuing it with the grandeur of nature. In this guide, we’ll explore the techniques and tools needed to seamlessly convert portrait photos into breathtaking landscapes.
Understanding the Difference: How Do Portrait and Landscape Photography Differ?

Before delving into the process of converting portraits to landscapes, it’s essential to grasp the fundamental disparities between these two genres of photography. Portrait photography focuses on capturing the essence of an individual or group, often emphasizing facial expressions, emotions, and personalities. On the contrary, landscape photography aims to showcase the beauty and vastness of natural scenery, encompassing wide vistas, dramatic skies, and intricate details of the environment.
Portrait and landscape photography are two of the most popular genres of photography. Portrait photography focuses on capturing the features and emotions of a person, while landscape photography focuses on capturing the beauty of the natural world. Both genres can be used to create stunning images, but they have different strengths and weaknesses.
Which genre is right for you?
The best genre of photography for you depends on your personal interests and preferences. If you enjoy working with people and capturing their emotions, then portrait photography may be a good fit for you. If you prefer to spend time outdoors and capture the beauty of nature, then landscape photography may be a better choice.
Tips for portrait photography
- Use good lighting. Natural light is usually the best, but you can also use artificial light if necessary;
- Pay attention to composition. Use the rule of thirds to create a balanced image;
- Focus on the eyes. The eyes are often the most expressive part of a person’s face;
- Experiment with different poses and angles;
- Get to know your subject. This will help you capture their personality and emotions.
Tips for landscape photography
- Find interesting compositions. Look for leading lines, rule of thirds placement, and interesting foreground elements;
- Use the right light. The best time to photograph landscapes is often at sunrise or sunset;
- Use a tripod. This will help you keep your camera still and capture sharp images;
- Use filters. Filters can help you to create different effects, such as making the sky bluer or the water smoother.
The best landscape photos often take time and effort to capture.
How Do You Choose the Right Portrait Photo?
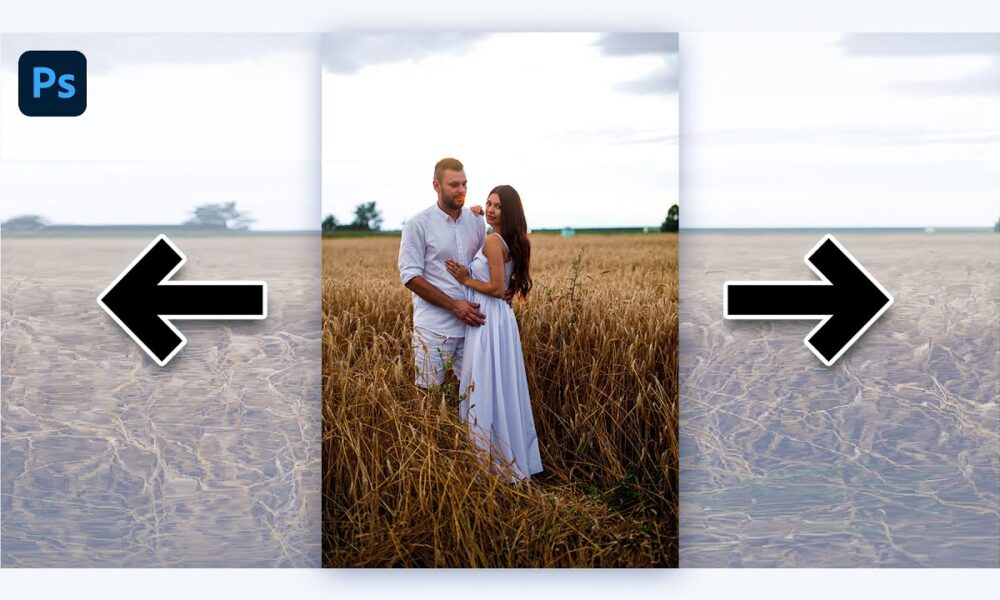
The key to a successful conversion lies in selecting the appropriate portrait photo. Look for images with a clear subject that can seamlessly blend into a landscape setting. Consider factors such as lighting, composition, and the overall mood conveyed by the portrait. Images with neutral backgrounds and subjects positioned towards the center tend to work best for this purpose.
- Choosing the Ideal Landscape Background/ Once you’ve chosen a suitable portrait photo, the next step is to select an appropriate landscape background. This background should complement the subject of the portrait while enhancing the overall narrative of the image. Look for landscape photos with similar lighting conditions, colors, and perspectives to ensure a seamless integration between the portrait and the background;
- Blending Techniques: Merging Portraits with Landscapes. Blending the portrait with the landscape background requires precision and attention to detail. Start by removing the existing background from the portrait using selection tools such as the Magic Wand or Quick Selection tool. Once the background is removed, place the portrait layer onto the landscape background and adjust its size and position as needed. Use layer masks and blending modes to seamlessly integrate the portrait with the landscape, paying close attention to lighting, shadows, and perspective;
- Enhancing Depth and Dimension. To add depth and dimension to the converted landscape photo, consider incorporating elements such as foreground elements, mid-ground details, and background elements. These additional elements not only enhance the visual interest of the image but also help create a sense of scale and perspective. Experiment with different layers, textures, and blending modes to achieve the desired effect;
- Fine-Tuning and Refinement. Once the portrait has been successfully integrated into the landscape background, it’s time to fine-tune the image and make any necessary adjustments. Pay attention to details such as color balance, contrast, saturation, and sharpness to ensure a cohesive and visually appealing final result. Use adjustment layers and filters to refine the overall look of the image while maintaining a natural and realistic appearance.
Converting portrait photos into landscapes is not just about technical prowess; it’s about unleashing your creativity and imagination. By following the techniques outlined in this guide and experimenting with different approaches, you can transform ordinary portraits into extraordinary landscapes that captivate and inspire viewers. So, pick up your camera, unleash your inner artist, and embark on a journey of endless possibilities in the realm of portrait to landscape conversion.
How Can You Expand Your Horizons by Transforming Portrait Photos into Captivating Landscapes?
You capture a stunning portrait of your friend, their joy radiating through the lens. But wouldn’t it be even more powerful to see them against the breathtaking backdrop of the mountain they just conquered, or beside the vibrant city scene they call home? This is where “portrait-to-landscape” magic comes in, transforming your photography and storytelling potential.
How to Move Beyond the Close-Up: Converting Portraits into Stunning Landscapes?
Portrait photography captures emotions and individuals, but sometimes, the environment adds another layer of meaning. Expanding your portrait into a landscape allows you to:
- Show context: Tell the story of your subject through their surroundings. Does a portrait by the ocean convey wanderlust, or does a city backdrop showcase their ambitions?;
- Create impact: Vast landscapes add drama and depth, making your subject’s presence even more captivating.
Whether it’s the serenity of a forest or the energy of a bustling street, the chosen landscape amplifies the emotion you want to portray.
Before diving into editing, master these composition techniques:
- Rule of Thirds: Divide your frame into a 3×3 grid. Place your subject along the lines or intersections for a balanced and pleasing composition;
- Leading Lines: Use elements like roads, rivers, or pathways to guide the viewer’s eye towards your subject and into the wider landscape;
- Negative Space: Don’t shy away from empty space! It can emphasize your subject and create a sense of peace or vastness.
Get closer to background elements for an immersive experience, connecting your subject to their surroundings.
How To Make A Portrait Photo Landscape? Editing Tools Unleashed
Now, let’s unlock the editing magic:
- Cropping: This basic option requires careful consideration to maintain subject integrity and avoid distortion;
- Content-Aware Fill: Advanced software like Photoshop can intelligently fill empty spaces, expanding the background seamlessly;
- Background Replacement: Replace the original background with a complementary landscape image, ensuring color matching and a natural blend;
- AI Tools: Emerging tools like Luminar AI and PortraitPro use AI to automatically expand backgrounds and fill in details, simplifying the process.
Remember: Choose portraits with potential for expansion and where the subject interacts meaningfully with the environment.
How To Make A Portrait Photo Landscape? Beyond the Technical
Transforming portraits goes beyond technical tricks. It’s about:
- Storytelling: Weave a narrative by connecting your subject to the landscape they inhabit;
- Evoking emotions: Let the scene and composition elicit feelings in your viewers;
- Creating connection: Deepen the understanding of your subject and their world.
Experiment, explore, and unleash your creativity! Remember, lighting and color grading can further enhance the mood and atmosphere of your transformed landscape portrait.
Conclusion
Portrait and landscape photography may seem like opposing forces, but they both offer boundless opportunities for creative expression and storytelling. Whether capturing the nuanced expressions of individuals or the vastness of nature’s wonders, photographers have the power to evoke emotions, provoke thought, and inspire awe through their images. By understanding the contrasts and similarities between portrait and landscape photography, photographers can expand their horizons, refine their skills, and create visually captivating imagery that resonates with audiences worldwide.